UVC9360SLSS Installation Manual: A Comprehensive Plan
This manual provides detailed guidance for installing your GE UVC9360SLSS vent hood, ensuring optimal performance and safety.
It covers everything from unboxing to smart device integration.
The GE UVC9360SLSS is a 36-inch smart designer custom insert vent hood finished in stainless steel. This model, manufactured from July 2018 onwards, offers powerful ventilation with its four-speed fan control, effectively removing smoke, grease, odors, and moisture from your kitchen.
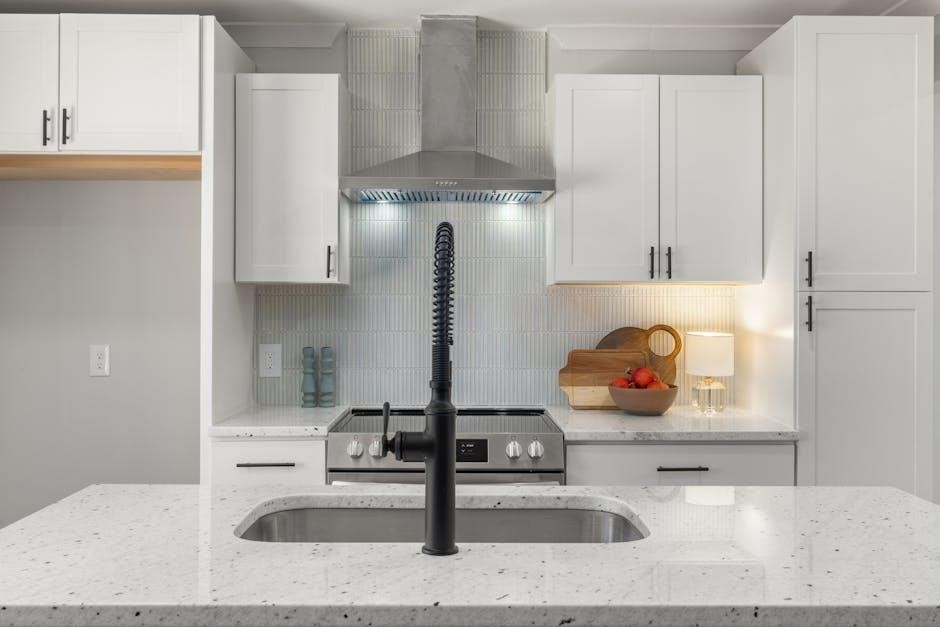
Designed for convenience, the UVC9360SLSS boasts dimmable LED lighting and can be seamlessly integrated with smart devices, allowing control via voice commands or a dedicated app. A remote control is also included for effortless operation from anywhere in the kitchen.
This installation manual provides comprehensive instructions to ensure a safe and efficient setup. It’s crucial to consult the packed installation instructions for the most current dimensional data before beginning. Proper installation guarantees optimal performance and longevity of your GE Profile vent hood.
Safety Precautions
Important Safety Instructions: Before commencing installation of your GE UVC9360SLSS vent hood, carefully read and understand all instructions and warnings. Disconnect the electrical power supply at the breaker panel before any wiring connections are made. Failure to do so could result in electric shock or fire;
Ensure the vent hood is properly grounded according to local electrical codes. This appliance is intended for indoor kitchen use only. Do not use outdoors or in damp environments. Wear appropriate safety glasses and gloves during installation to protect against sharp edges and debris.
Observe all local building and ventilation codes. Improper installation can create a fire or electrical hazard. If you are unfamiliar with electrical or ductwork installation, consult a qualified professional. Always verify the structural integrity of the mounting surface before attaching the vent hood.
Unboxing and Component Verification
Upon receiving your GE UVC9360SLSS vent hood, carefully inspect the packaging for any signs of damage during transit. If damage is evident, immediately contact the retailer or shipping carrier. Gently open the carton and remove all components, laying them out on a protected surface to prevent scratches.
Verify Package Contents: Ensure all listed parts are present. This includes the vent hood body, mounting bracket, duct adapter, LED light modules, remote control, installation hardware (screws, anchors), and this installation manual. A complete parts list is typically included within the packaging.
Compare the received components with the parts list to confirm everything is accounted for. If any parts are missing or damaged, do not proceed with installation and contact GE Appliances customer service for replacements. Retain all packaging materials until the installation is complete and you are satisfied.
Checking Package Contents
Carefully cross-reference the physical contents of the box with the detailed packing list provided. The UVC9360SLSS package should include the main vent hood unit constructed of stainless steel. Verify the presence of the mounting bracket, crucial for secure installation, and the duct adapter, facilitating connection to your existing ductwork.
Confirm the inclusion of all LED light modules, essential for illuminating the cooking surface. Locate the remote control, enabling convenient operation of the hood’s features. A comprehensive hardware kit containing screws and anchors for various wall types is also expected.

Don’t overlook the installation manual itself – your primary guide throughout the process. Finally, ensure the presence of any included warranty information or registration cards. If anything is missing, immediately contact GE Appliances support for assistance before proceeding.
Required Tools and Materials
Successful installation of your GE UVC9360SLSS vent hood demands specific tools and materials. You’ll need a Phillips head screwdriver for securing various components, and a flathead screwdriver for adjustments. A power drill with appropriate drill bits is essential for creating mounting holes in your wall or cabinetry.
A level is crucial to ensure the hood is installed straight and functions correctly. Duct tape, specifically metallic foil tape, is required for sealing ductwork connections, preventing leaks. Wire strippers and wire connectors are necessary for safe electrical connections.
Additionally, a measuring tape will aid in accurate placement and ductwork sizing. Safety glasses are paramount for eye protection during drilling and installation. Finally, have a stud finder on hand to locate wall studs for secure mounting. Consider gloves for handling stainless steel components.
Installation Planning & Dimensional Data
Careful planning is vital before installing your GE UVC9360SLSS vent hood. Begin by consulting the packed installation instructions for the most current dimensional data – these supersede any generalized guides. Determine the optimal hood placement relative to your cooktop, ensuring adequate clearance for efficient smoke and odor capture.
Consider existing cabinetry and wall structures. Verify sufficient space for ductwork routing, both internally and externally. Note the hood’s height and width to confirm it fits the designated area without obstruction.
Account for electrical outlet proximity and accessibility for future maintenance. Prioritize a location that allows for easy access to the fan and lighting components. Proper planning minimizes complications during installation and maximizes the hood’s performance and aesthetic integration into your kitchen.
Determining Hood Placement
Optimal placement of your GE UVC9360SLSS vent hood is crucial for effective kitchen ventilation. Generally, the hood should be positioned 24 to 30 inches above the cooktop surface, but always verify this within the official installation instructions. Ensure the hood’s width is equal to or slightly wider than the cooktop to capture all rising smoke and grease.
Consider the surrounding cabinetry. Avoid placing the hood too close to side walls or cabinets, as this can restrict airflow. Maintain adequate clearance for ductwork installation and access for future servicing.
Think about visual balance within your kitchen design. The hood should complement the overall aesthetic without appearing awkwardly positioned. Proper placement enhances both functionality and the kitchen’s appearance.
Electrical Connection
Important: Electrical work should only be performed by a qualified electrician, adhering to all local codes and regulations. The GE UVC9360SLSS vent hood requires a dedicated 120V, 60Hz electrical circuit. Verify your home’s electrical system meets these requirements before beginning installation.
Consult the detailed wiring diagram included with the hood and in the owner’s manual. Ensure the circuit is properly grounded. Incorrect wiring can lead to fire hazards or damage the appliance.
Before connecting the hood, disconnect power to the circuit at the breaker box. Use appropriate wire connectors and ensure all connections are secure. After installation, test the hood’s functionality, including lights and fan speeds, to confirm proper operation.
Wiring Requirements
The GE UVC9360SLSS vent hood necessitates a standard 120-volt, 60Hz electrical connection. A dedicated circuit is strongly recommended to prevent overloading and ensure optimal performance. The minimum wire gauge required is 14 AWG, but 12 AWG is preferable for longer runs.
A grounded three-prong outlet is essential for safety. Do not use extension cords or adapters. The appliance should be connected directly to the electrical system. Ensure the electrical box is securely mounted and capable of supporting the hood’s weight.
Refer to the detailed wiring diagram provided within the installation manual for specific connection instructions. Always disconnect power at the breaker before commencing any electrical work. Improper wiring can void the warranty and create a safety hazard.
Ductwork Installation
Proper ductwork is crucial for effective ventilation. The GE UVC9360SLSS vent hood requires a 7-inch round or 6×8-inch rectangular duct. Using smaller ductwork will reduce airflow and diminish the hood’s performance. Smooth, rigid metal ductwork is recommended for optimal efficiency; flexible ducting should be kept as short and straight as possible.
Ensure all duct connections are securely sealed with foil tape to prevent air leaks. Avoid sharp bends in the ductwork, as these restrict airflow. The duct should terminate to the outside of the building, never into an attic or crawlspace.
Consider using a damper in the duct to prevent backdrafts when the hood is not in use. Refer to local building codes for specific ductwork requirements.
Duct Size and Material Specifications
The GE UVC9360SLSS vent hood mandates a duct size of either 7-inch diameter round ducting or 6×8-inch rectangular ducting for peak performance. Deviation to smaller dimensions significantly compromises airflow, reducing the hood’s ability to effectively remove smoke, grease, and odors.
For material, prioritize smooth, rigid metal ductwork – galvanized steel is a common and effective choice. While flexible ducting can be used, minimize its length and ensure it’s as straight as possible to avoid airflow restriction.
Always utilize foil tape to create airtight seals at all duct connections, preventing air leakage. Avoid using duct tape, as it degrades over time. Adherence to these specifications guarantees optimal ventilation efficiency.
Mounting the Vent Hood
Prior to mounting, verify the wall structure can adequately support the UVC9360SLSS’s weight. Locate wall studs for secure attachment; using appropriate screws is crucial. Consult the installation instructions packed with the product for current dimensional data and precise mounting height recommendations – typically 30-36 inches above the cooktop.
Carefully position the vent hood, ensuring it’s level. Mark the mounting holes, drill pilot holes, and install the mounting bracket securely to the wall studs. Lift the hood onto the bracket, aligning the mounting holes.
Secure the hood with the provided screws, tightening them firmly but avoiding over-tightening. Double-check the hood’s stability and levelness before proceeding to the next installation step.
Connecting the Fan
Before connecting the fan, ensure the ductwork is properly installed and secured. Locate the fan housing within the UVC9360SLSS unit. Carefully connect the fan motor to the blower wheel, ensuring it’s firmly attached and rotates freely.
Connect the fan’s electrical wiring to the designated terminals, following the wiring diagram provided in the installation manual. Double-check all connections for tightness and proper insulation.
The UVC9360SLSS features a four-speed fan control, allowing for adjustable ventilation. Verify the fan operates correctly at all speed settings after connection. Ensure there are no obstructions hindering the fan’s performance.
Installing Dimmable LED Lighting
The GE UVC9360SLSS vent hood incorporates dimmable LED lighting for enhanced visibility during cooking; Locate the LED light module within the hood’s housing. Carefully connect the LED lighting’s wiring harness to the corresponding connector inside the unit, ensuring a secure fit.
Verify the wiring connections align with the installation manual’s diagram. Once connected, test the lighting functionality to confirm proper operation. Utilize the vent hood’s control panel to adjust the brightness levels, confirming the dimming feature works as expected.
Ensure the LED lights are securely mounted and do not interfere with any other components. Proper installation guarantees optimal illumination and extends the lifespan of the LED lighting system.
Remote Control Setup
The UVC9360SLSS vent hood includes a remote control for convenient operation from anywhere in the kitchen. Begin by inserting the provided batteries into the remote control’s battery compartment, observing correct polarity. Power on the vent hood and then press the power button on the remote to initiate pairing.
If the hood doesn’t respond immediately, consult the manual for specific pairing instructions, which may involve holding a button on the hood itself. Once paired, the remote should control all hood functions, including fan speed, lighting, and power.
Test each function to ensure proper operation. Keep the remote control away from excessive moisture and direct sunlight to prolong battery life and maintain functionality.
Smart Device Integration (Chef Connect)
The GE UVC9360SLSS vent hood boasts Chef Connect technology, enabling seamless synchronization with compatible GE ranges. This feature allows automatic control of the hood’s lights and fan when the range is in use, enhancing convenience and kitchen air quality.

To activate Chef Connect, download the SmartHQ app on your smartphone or tablet and create an account. Follow the in-app instructions to connect both your vent hood and GE range to your home’s Wi-Fi network. Once connected, enable the Chef Connect function within the app settings.
Ensure both appliances are within Wi-Fi range for reliable communication. You can also control the hood via voice commands through compatible smart home devices.
Testing and Verification
After completing the installation of your GE UVC9360SLSS vent hood, thorough testing is crucial to ensure proper functionality and safety. Begin by verifying the electrical connection – confirm the hood powers on and the LED lighting illuminates correctly across all dimming levels.
Next, test the four-speed fan control, ensuring each speed operates as expected and effectively removes smoke and odors. Check the remote control functionality, verifying all buttons respond appropriately. If Chef Connect is enabled, confirm synchronization with your GE range.
Finally, inspect all ductwork connections for airtight seals to maximize ventilation efficiency. Address any issues immediately before full operation. A properly installed and tested hood guarantees optimal performance.
Troubleshooting Common Issues

If your GE UVC9360SLSS vent hood isn’t functioning correctly, begin by checking the power supply and electrical connections. If the lights don’t illuminate, verify the LED settings and bulb integrity. For fan issues, ensure the motor isn’t obstructed and the speed control is functioning.
Remote control problems often stem from battery depletion or signal interference; try replacing the batteries or repositioning the hood. Chef Connect synchronization failures may require resetting both the hood and the connected range.
If ductwork seems inefficient, inspect for leaks or blockages. For further assistance, consult the GE Appliances website (geappliances.com) or contact the GE Answer Center Service at 800.626.2000.
Warranty Information and Service Contact
Your GE UVC9360SLSS vent hood is covered by a GE Appliances warranty, protecting against manufacturing defects in materials and workmanship. The duration of coverage varies depending on the specific component and model year – typically, one year for parts and labor, with extended options available.
To register your appliance and review the complete warranty details, visit the GE Appliances Owner Center online. For service or repair inquiries, contact the GE Answer Center Service directly at 800.626.2000.
Have your model number (UVC9360SLSS) and serial number readily available when contacting service. You can also schedule service appointments and find authorized service providers through the GE Appliances website.